Recent Why SERVPRO Posts
Preventing Dryer Fires
7/19/2022 (Permalink)
Keeping Dryer Fires at Bay
A lint fire is a dangerous and preventable situation. Nearly 34 percent of the 2,900 dryer fires that occur annually are because homeowners fail to maintain and clean their dryers correctly. Therefore, it is vital to understand the areas of your dryer that should be regularly inspected and to understand when professional maintenance should be performed.
1. Lint Filter
The most apparent cause of any dryer fire is a dirty lint filter. Lint is essentially kindling for the fire, and if not removed frequently and thoroughly it can ignite in the high heat of a dryer. Therefore, you should clean the lint from the filter before and after every use. Also, biannually, you may want to use a nylon brush to clean any residual dust from the crevices of the filter.
2. Behind Dryer
Many people incorrectly assume that a fire stemming from dryer use must occur inside the dryer, but this is not true. A lint fire can begin outside of the appliance and often does, especially when there is a buildup of dust and debris behind the unit, nestled around the vent tube and pipe. Therefore, at least once a month, it is a good idea to pull the dryer out and clean.
3. Vent Pipe
While a vent pipe may be protected from massive buildups of lint because of the dryer filter, it can still develop mounds of dust and lint remnants that have the potential to start a fire, especially if these mounds block the exhaust, allowing heat to build in the pipe and dryer. Therefore, you should aim to clean the vent pipe at least once every three months.
4. Maintenance
Sometimes, despite your best efforts, your dryer is not functioning as it should. If this occurs, you may want to contact an appliance repair company or a plumbing specialist in the Hendersonville area to look over your appliance and determine a cause for the issue.
A lint fire can lead to substantial loss. However, it can be prevented through due diligence and a proper cleaning schedule. Don’t fall victim to one of the leading causes of home fires, clean your lint and dryer vent routinely.
Commercials Owners Face Multiple Repairs During Fire Restoration
4/13/2022 (Permalink)
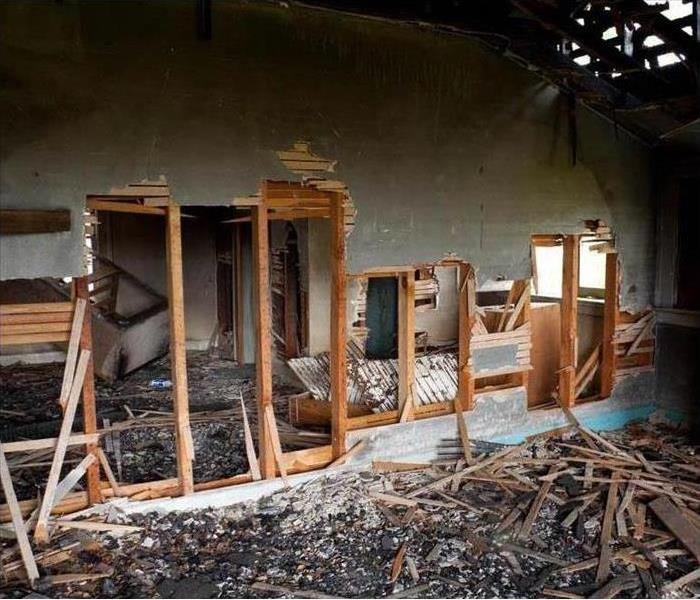 We want to help restore your property after a fire.
Fire Restoration
Fire restoration is a complex process involving more than merely dealing with ashen walls. Commercial owners in Mills River, NC, face several significant hurdles to returning the structure into a safe, functional space. Proprietors should expect to handle multiple stages and concepts over several weeks to months, depending on the severity of the destruction. Working with insurance and a remediation team may simply be the process as business leaders move through the following fire cleanup stages.
1. Secure the Facility
Before a fire rebuild happens, the premises must be contained, safeguarding the establishment from additional property harm as well as potential lawsuits. Expert care is given to board up any exposures in the roof or walls, preventing wind and rain from hurting the structure. Also, trespassers, robbers and vagrants see a burnt building as an easy target. It’s essential to work with people who understand how to defend the entire structure.
2. Survey the Building’s Damage
During fire restoration, crews must think about several elements:
- odor treatment
- ash cleanup
- restoring deteriorated parts
- mold containment
- water cleanup
- electrical hazards
A water remediation company such as SERVPRO has experts in all of these fields, capable of saving agencies and owners from calling multiple services. Instead, tied into one team, they collaborate to establish efficient, methodical restoration.
3. Treat the Space and Belongings
Specialists use high-tech equipment to salvage electronics, photos and documents, and items deemed especially valuable and hard to replace during rebuilding services. This assists in cost replacement.
The general location is dried to avoid secondary issues such as mold. With that complete, those employees can directly contact a crew to begin washing and scrubbing the facility. A final group of construction staff repairs anything torn out or burnt through.
Fire restoration demands focus, concentration and teamwork since so many stages are required. With a group working as one, owners and agents streamline the efforts and simplify contact information, making the ordeal simpler and smoother.
The SERVPRO Disaster Recovery Team
2/16/2022 (Permalink)
The SERVPRO Disaster Recovery Team Is Here To Help.
There are times that extremely thorough storm response is required from a damage restoration company in Etowah, NC. Major weather-related disasters can be hard for a local service to handle alone. Luckily, SERVPRO is different in that its corporate team is ready to help local franchises with disaster recovery in severe situations.
Prepared for Any Storm
SERVPRO corporate is ready to help local Etowah, NC, teams during blizzards, tornadoes, floods and other disasters by sending crucial disaster equipment that would otherwise not be present at these smaller local franchises. Here are some of the infamous disasters from recent history where SERVPRO corporate professionals and local Catastrophic Storm Response Teams around the country provided much-needed emergency storm services:
- Hurricane Katrina in 2005
- California wildfires in 2007
- Chicago floods in 2007
- Hurricane Ike in 2008
- Nashville floods in 2010
- Hurricane Sandy in 2012
- Polar Vortex in 2014
- Carolina floods in 2015
- Hurricane Irma in 2017
- California wildfires in 2017
SERVPRO is uniquely equipped with temporary labor teams, production professionals, large-loss experts and specialized managers who are ready to help in whatever way needed when a monstrous storm hits and necessitates fast and efficient disaster recovery.
Faster to Any Size Disaster
Whether a storm is large or small, SERVPRO’s 1700 franchise employees and corporate teams are ready at a moment’s notice to help with storm damage assessment, restoration and remediation. Whether a massive flood suddenly takes over or a violent wildfire starts to spread, SERVPRO technicians are ready to do whatever they can to help restore normalcy and peace.
It is not always easy for anyone or any organization involved in disaster recovery to know what the best plan of action is to pursue, but SERVPRO teams use their experience and skills to take every possible action in to do the right thing at the right time. They are always Here to Help.
DIY Solutions for Removing Shower Mold
1/30/2022 (Permalink)
Natural Cleaning Ingredients
Some homes in Flat Rock, NC, have issues with shower mold. Whether it is the high humidity, lack of ventilation, or abundance of spores, bathroom mold can be a constant problem. Many people grab a commercial cleaner to use in the battle against the unsightly fungus, but others prefer the use of more natural cleaning agents. Here are four cleaning ingredients you can find in your cupboard.
1. Borax
Borax is a great cleaner. Dissolve one-fourth cup of the crystals into one quart of water. Spray the solution on the problem area and use a brush to scrub the moldy zone. Rinse the area and repeat the process as needed.
2. Hydrogen Peroxide
For a great cleaning solution, fill a dark spray bottle with hydrogen peroxide and add two tablespoons of vinegar. Spray the cleaner on the shower mold and wait for half an hour. Spray again and wait for an hour. Wipe the area clean and repeat if necessary.
3. Vinegar
One of the best household cleaners, vinegar is known for its acidity and that makes it a natural solution to a black mold problem. Spray a full-strength solution of vinegar on the mold and wait an hour. Repeat as necessary, and then use hot water to rinse the area and dry completely.
4. Bleach and Baking Soda
Using a little hot water, a cup of baking soda, and a few drops of scented oil, form a loose paste. Spread the paste over the area and remove the majority of the mold. Once most of the fungi are gone, spray a solution of two parts water and one-part bleach on the area and allow it to dry. Repeat the spray if necessary, and rinse with water.
Although a mold colony can begin life as a small spot, it can quickly grow into an unsightly area. With these simple DIY household cleaning solutions, you can quickly vanquish that shower mold and return to a clean bathroom. If the mold keeps appearing, consider calling a mold remediation company to find the underlying problem.


 24/7 Emergency Service